

(3D) Build Renders
A product is composed of several resources that allow its 3D visualization: parts, materials, colors. For further information please read the concepts document thoroughly, and explore the example zips provided.
In order to make this visualization possible using the PRC strategy, it's necessary to create (3D) Build Renders.
These renders are the final output from the 3D process, which is used as an input for the (3D) build creation.
There are several rules that must be followed when creating the (3D) Build Renders assets:
- For each (
part,material,color) combination, a sequence of frames must be rendered (ie: 24 frames around the vertical axis + 1 top frame); if the model contains any print, stamp or important detail, an additional frame must also be rendered - The file format is always
png - The color profile is always
sRGB IEC61966 - Images must have a Aspect Ratio of
1:1(ie:1000x1000,2000x2000, etc..) - Images must be rendered at least in
1000x1000resolution - Images are recommended not to have background
- All the different parts of the product once composed together should cast shadows properly
- The light set should be very neutral, avoiding dramatic shadows or burned white areas
- All the renders must be done with the product always in the same exact position, the camera must move around it in 360 degrees, plus one top view camera
- The
shadowpart must follow the (part,material,color) convention, thematerialvalue andcolorvalue being set todefault

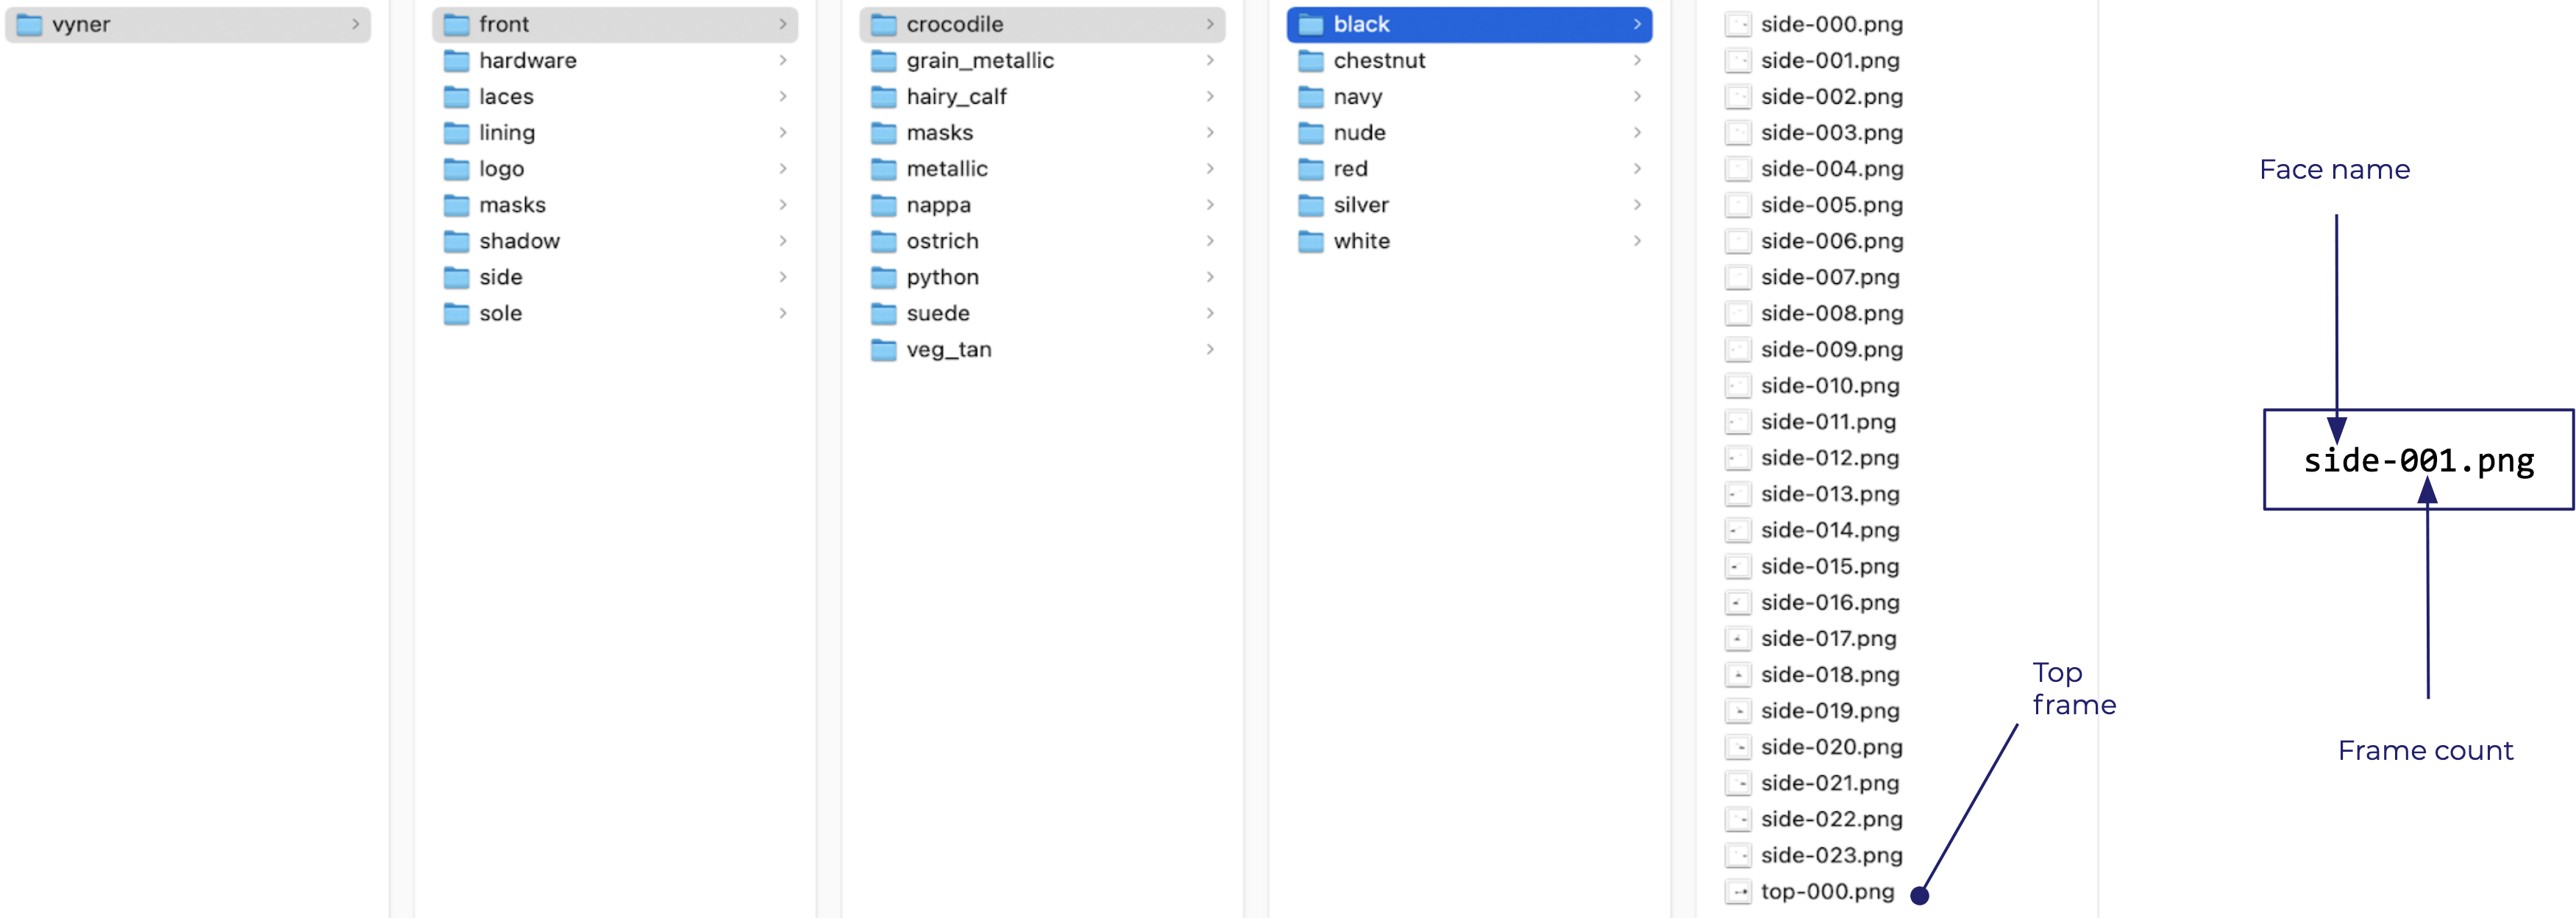
The output pngs files that are generated must be stored in a five level folder depth (model -> part -> material -> color -> frame) directory tree that is organized and named following the structure:
\- model
  \- part
    \- material
      \- color
        \- side-000.png
        \- side-001.png
        (...)
        \- side-023.png
        \- top-000.png
      \- other_colors
    \- other_materials
  \- other_parts
\- other_models
modelrefers to the name of the model itselfpartrefers to the specific part of the mesh that will be rendered on that Render Layer - a model is normally composed by multiple meshesmaterialrefers to the material that will be rendered in the defined part of the Render Layercolorrefers to the color of the defined material of the Render Layer
- folders' naming follow the lowercase
snake_caseconvention - files naming follow the lowercase
kebab-caseconvention - if a frame is not used for a certain part-material-color, an empty png should still be provided.
- the masks folders should not be provided and will be generated afterwards.
With the assets provided, the following composition can be achieved:
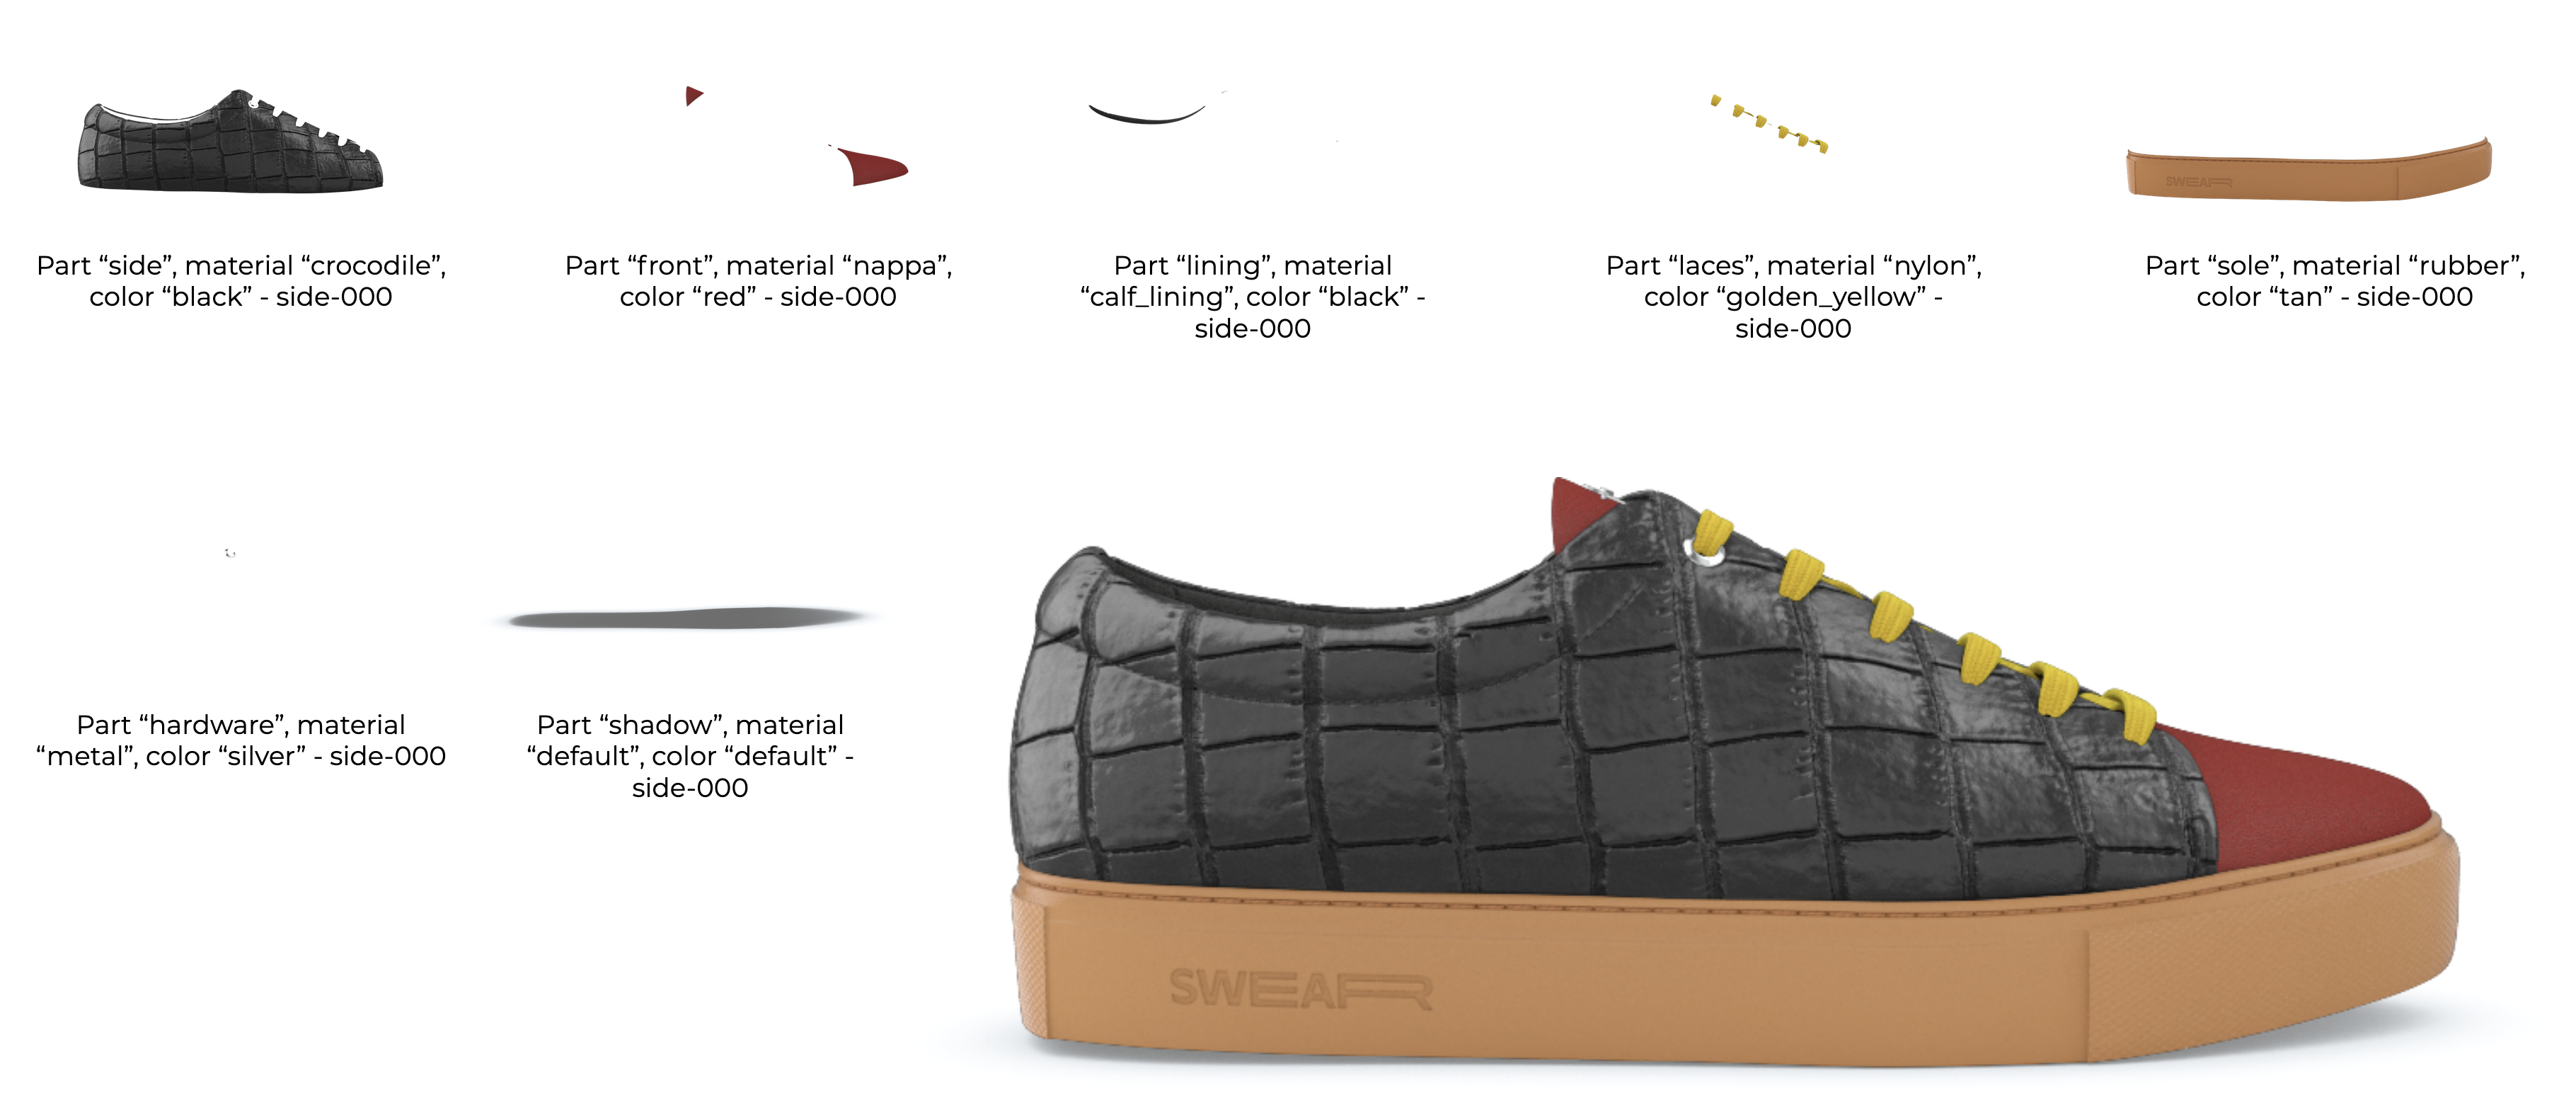
If you want to examine an example of this build, check out the zip example.
Photography Based (3D) Build
Using the PRC strategy you can also create Photography Based (3D) Builds. With some post-production work, you can cut photos to cover all the possible combinations of (parts, materials, colors), ie:
├── base
│   └── leather
│       ├── pink
│       │   ├── closed-000.png
│       │   └── open-000.png
│       └── white
│           ├── closed-000.png
│           └── open-000.png
├── flap
│   └── leather
│       ├── pink
│       │   ├── closed-000.png
│       │   └── open-000.png
│       └── white
│           ├── closed-000.png
│           └── open-000.png
├── handle
│   └── leather
│       ├── pink
│       │   ├── closed-000.png
│       │   └── open-000.png
│       └── white
│           ├── closed-000.png
│           └── open-000.png
└── hardware
    └── metal
        └── gold
            ├── closed-000.png
            └── open-000.png
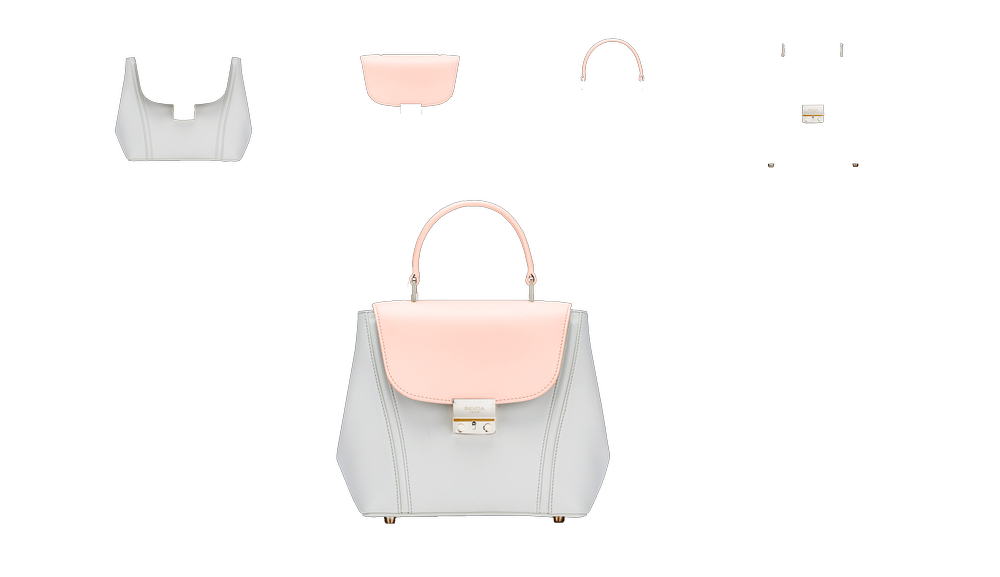
You can view an example of this build in the zip example.
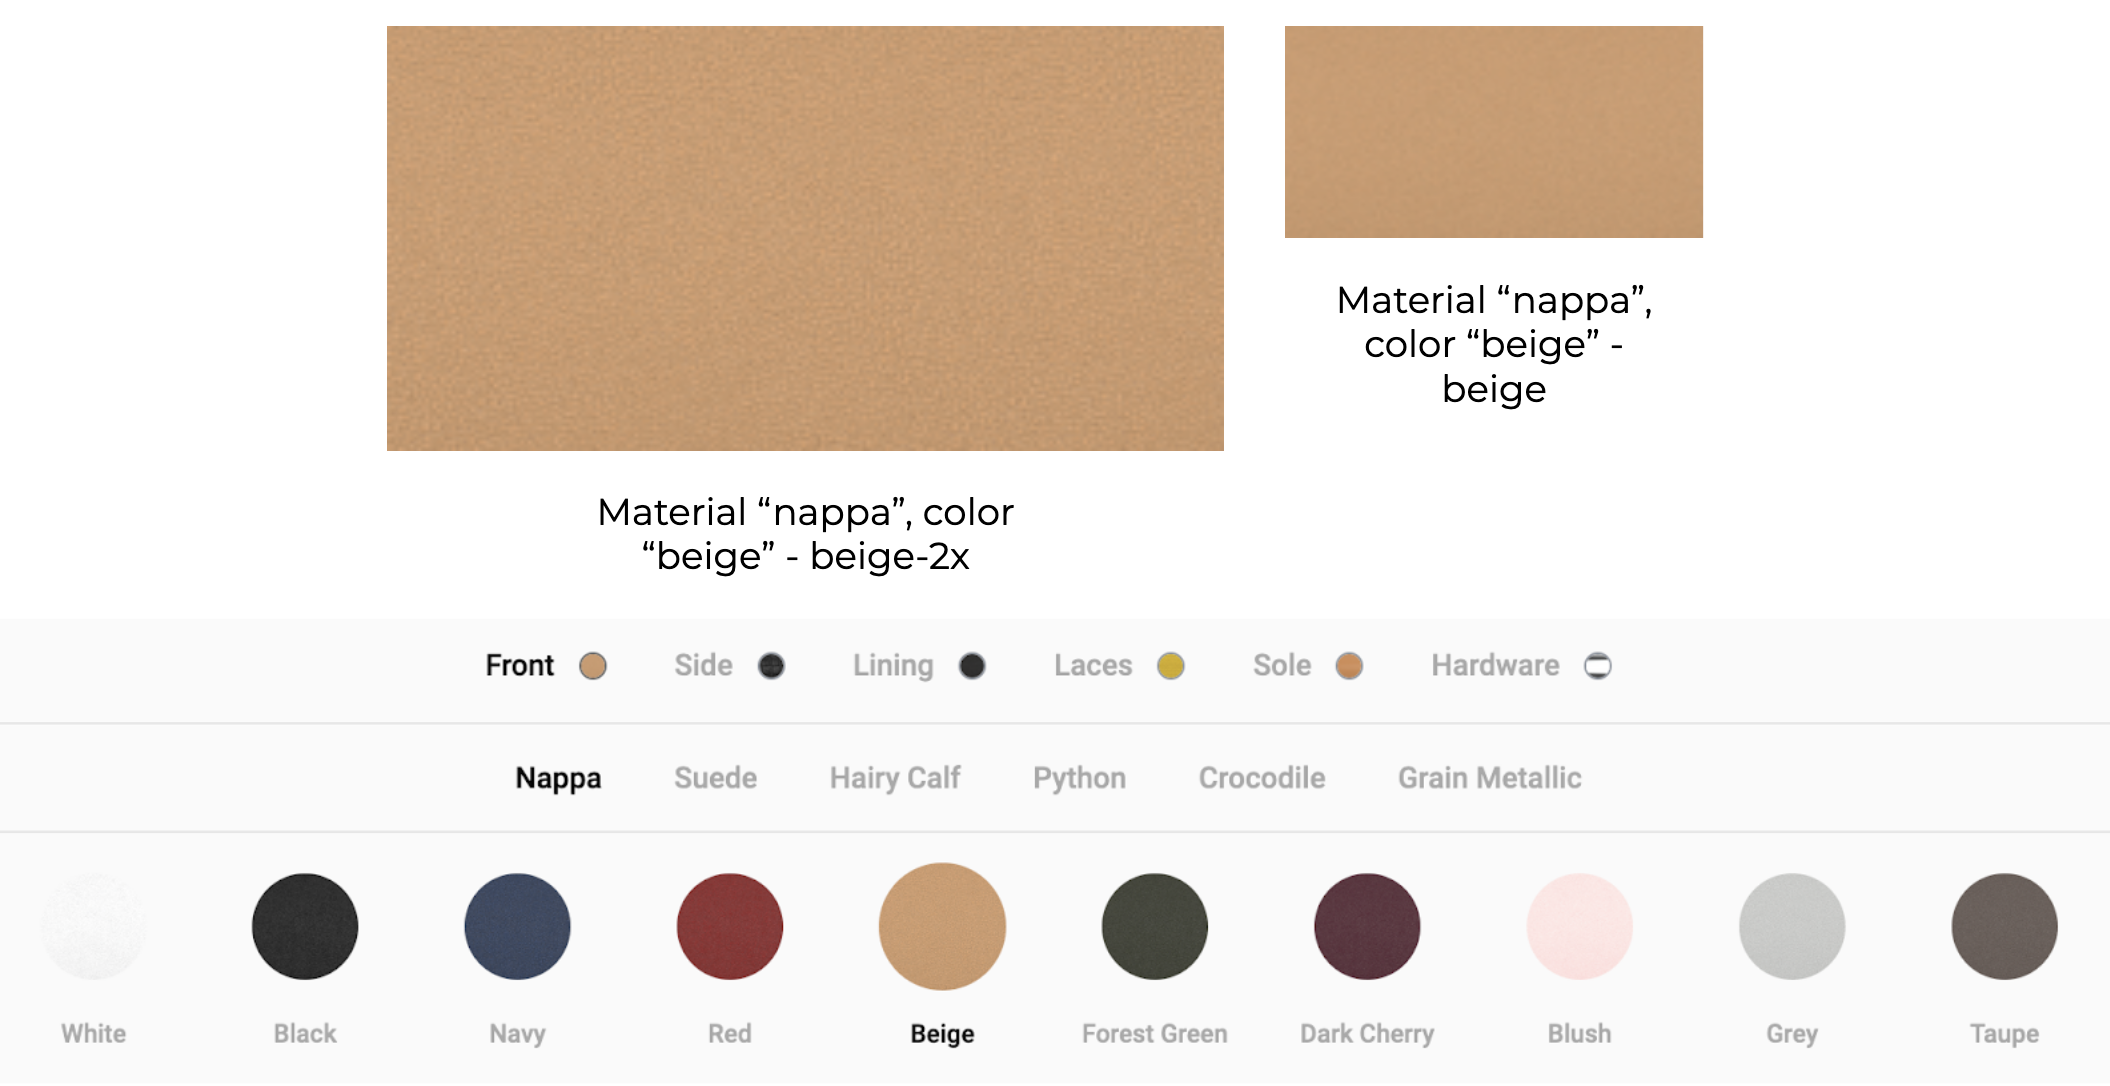
Swatches
For each (material, color) combination for every part (customizable or not), two sample images (swatches) are required, with different dimensions:
220x120(2x)110x60
The material name must comply with the ones defined for the parts.
| Example | Directory Structure |
|---|---|
 | 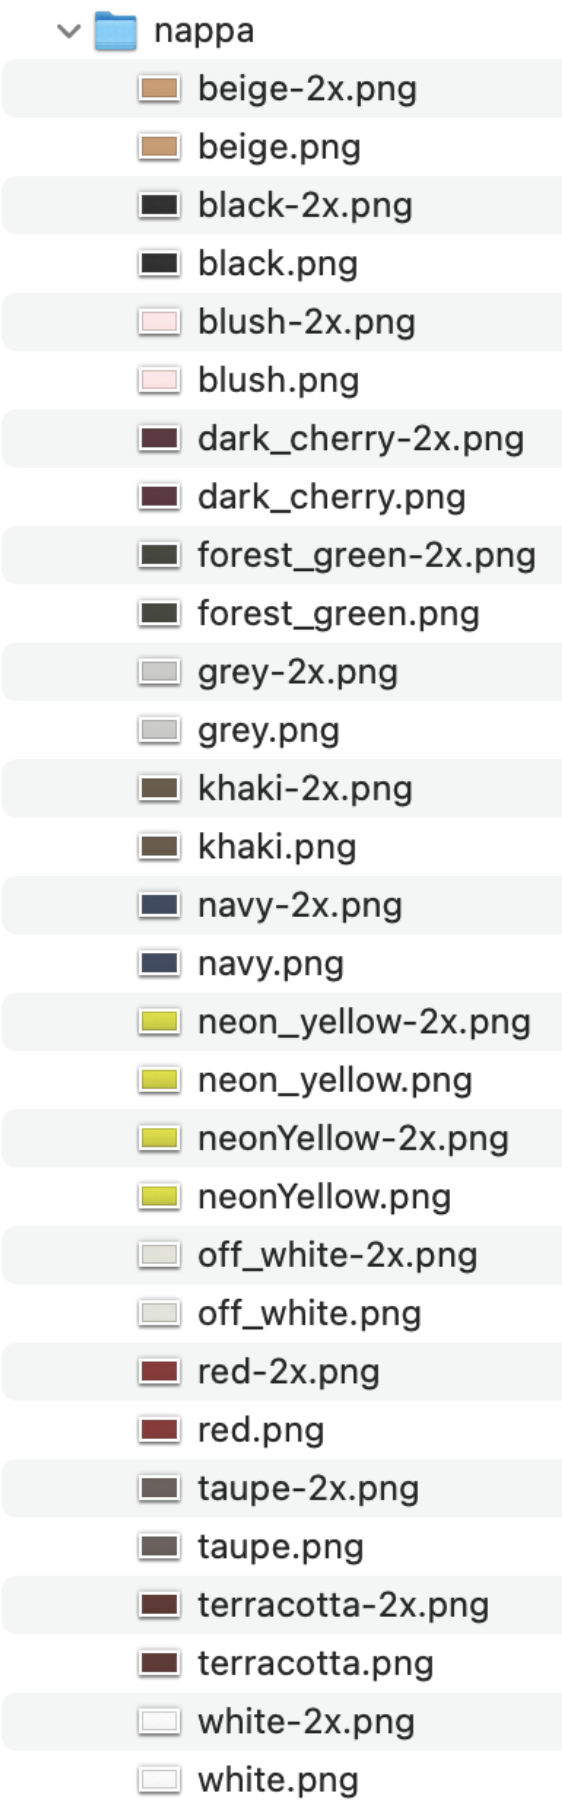 |
Normally the swatches are added to the swatches directory of a build, where each swatch is saved inside a folder with the name of the material it represents. These swatches are available for all models of the build. However, two models of the same build can have the same material but with different swatches. To allow that, the swatches can be added in the swatches directory inside a folder with the name of the model, e.g. <name of the model>/<name of the material>/<swatches>. These swatches are more specific and will be picked first for the given model.